A study published in the Journal of Sports Sciences revealed that a player’s grip pressure can involuntarily spike by over 300 percent during the transition phase of the downswing. That unintentional death-grip acts like a physical brake, restricting wrist hinge, slowing down rotation, and twisting the clubface right before impact.
If you understand how tiny adjustments alter performance—much like dialing in manual focus on a high-end camera or adjusting lens stabilization—you already possess the mindset needed to master how to grip a golf club. The handle is your primary input interface. When your hand placement is misaligned by even a fraction of an inch, your brain compensates with micro-adjustments that ruin speed and accuracy.
The Biomechanics of the Golf Interface
Golf biomechanics research consistently demonstrates that the clubface angle at impact accounts for roughly 85 percent of a ball’s initial launch direction. Because your hands are the sole link connecting your body’s kinetic chain to the shaft, your grip dictates where that clubface points.
When you swing, energy transfers from your legs through your core, shoulders, arms, and finally out into the shaft. If your connection at the handle is unstable, energy bleeds out before reaching the ball.
Holding a golf club correctly isn’t about applying sheer muscle power. It is about establishing mechanical leverage and neutral alignment so your wrists can hinge and unhinge without force. For beginners, choosing the right clubs also matters.
What Golf Clubs Do You Really Need as a Beginner? A basic set typically includes a driver, a few irons, a wedge, and a putter, giving new players enough variety to learn different shots without carrying unnecessary equipment.
Step-by-Step Alignment: Lead Hand, Trail Hand, and Connection
To build an repeatable setup, you must position each hand systematically. For a right-handed golfer, the left hand serves as the lead anchor, while the right hand acts as the steering guide.
+———————————————————————–+
| LEAD HAND ALIGNMENT |
| • Position shaft diagonally from base of pinky to index middle joint |
| • Wrap fingers underneath; confirm 2 to 3 knuckles are visible |
| • Align lead thumb down the right-center portion of the shaft |
+———————————————————————–+
|
v
+———————————————————————–+
| TRAIL HAND ALIGNMENT |
| • Nest trail palm lifeline directly over the lead thumb |
| • Wrap fingers around the bottom; form a solid interlock or overlap |
| • Verify both hand “V” lines point toward your trail shoulder |
+———————————————————————–+
The Lead Hand Anchor
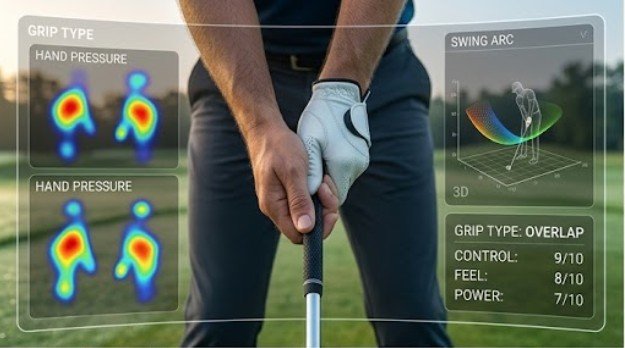
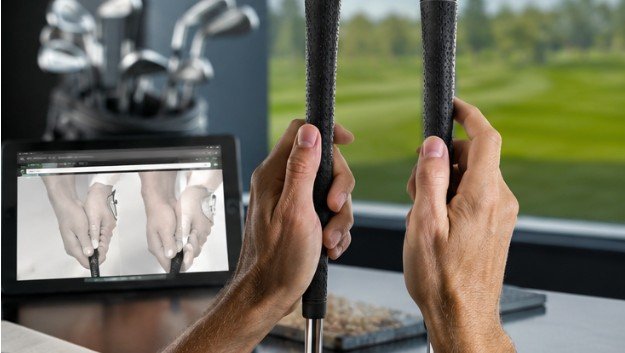
Place the grip diagonally across the fingers of your left hand, starting from the base of your pinky finger and extending across to the middle joint of your index finger. Avoid letting the shaft sit flat across your palm, which limits wrist mobility.
Once your fingers wrap around the handle, look down at address. You should clearly see two to three knuckles on your left hand. The “V” shape formed between your thumb and index finger should point toward your right shoulder.
The Trail Hand Integration
Bring your right hand onto the club directly below your left. The pad or lifeline of your right palm should fit snugly over your left thumb like a puzzle piece.
Wrap your fingers around the underside of the handle. Just like your lead hand, the “V” formed by your right thumb and index finger ought to point toward your right shoulder, ensuring both hands work in complete symmetry.
Comparing the Three Major Grip Styles
How you connect your lead and trail hands depends heavily on your hand size, finger length, and personal comfort.
| Grip Style | Mechanical Connection | Best Suited For | Primary Benefit |
| Overlap (Vardon) | Trail pinky rests in the groove between lead index and middle fingers. | Golfers with larger hands or strong forearm control. | Promotes unified hand movement without crowding fingers. |
| Interlock | Trail pinky links between lead index and middle fingers. | Golfers with smaller hands or lighter wrist strength. | Locks hands securely to prevent slipping during high speed. |
| Ten-Finger (Baseball) | All ten fingers rest directly on the grip with no overlap or link. | Beginners, junior golfers, or players with joint pain. | Maximizes leverage and surface contact for extra comfort. |
Editor’s Note: For visual learning materials, this comparative data works best presented as a side-by-side radial feature chart comparing stability versus mobility.
The Pressure Paradox: Why Soft Hands Generate Speed
Photographers know that squeezing a camera body tightly introduces micro-jitters, whereas a relaxed holding technique yields sharper shots. Golf operates on identical mechanics.
The same attention to technique should extend to equipment selection, which is where a Golf Bag Buying Guide can help beginners choose a bag with the right balance of storage, weight, club organization, and portability.
When you squeeze a golf club tightly, tension instantly travels up your flexor tendons, locking your forearms and tightening your chest. This tension prevents your wrists from fluidly hinging on the backswing and snapping through impact.
Aim for a grip pressure of roughly 4 or 5 on a scale of 1 to 10. You want enough firmness to maintain control of the shaft, but enough softness to retain elasticity in your wrists and forearms.
Practical Diagnostic: The Paper Cup Test and Wear Patterns
To calibrate your tactile awareness on the practice tee, try these quick diagnostic checks:
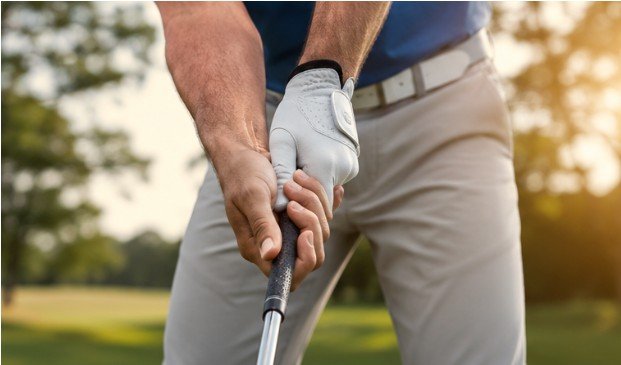
- The Empty Paper Cup Test: Hold an empty paper cup in your hands and make a slow, smooth practice swing motion. If the cup buckles or crunches at any point, your grip pressure is far too high.
- Glove Wear Inspection: Examine the palm of your golf glove after a round. If you notice tears or heavy wear around the heel of the palm, you are holding the club in your palm rather than your fingers. Equipment choices can also affect how you approach the course, especially when comparing a Golf Watch vs Golf Rangefinder for distance information and shot planning.
- The Hover Test: Address the ball, lift the clubhead 2 inches off the ground, and waggle the face gently. If your shoulders feel rigid, loosen your fingers until the club feels weightless.
Variations and Common Exceptions
While neutral positioning works best for most players, physical variations require slight modifications:
- Strong Grip: Rotating both hands slightly toward your trail side displays 3 to 4 knuckles. This helps players who struggle with slicing close the clubface faster.
- Weak Grip: Rotating hands toward your lead side shows only 1 knuckle. This prevents hooked shots for high-velocity players.
- Arthritic Modifiers: Golfers dealing with injuries and joint pain often benefit from oversized grip sizes, which reduce the finger squeeze required to stabilize the club.
Frequently Asked Questions
1. What is the perfect way to grip a golf club?
The ideal grip places the club through your fingers with two knuckles visible on your lead hand, a neutral trail hand, unified finger connection, and light, relaxed tension.
2. How do you grip a golf club for beginners?
Beginners should start by placing the club in the fingers of their lead hand, closing their thumb down the shaft, and securing their trail hand using an interlock or ten-finger connection with light pressure.
3. What is the 80/20 rule in golf?
The 80/20 rule suggests that 80 percent of your shot quality comes from 20 percent of your foundational setup—primarily your grip, posture, alignment, and balance before the swing even starts.
4. What are the 3 P’s in golf?
The 3 P’s stand for Posture, Position (ball position), and Alignment/Path. Mastering these fundamental pre-shot elements establishes the framework for a consistent, repeatable golf swing.
Mastering your connection to the handle removes unwanted variables from your motion. Just as fine-tuning your gear produces crisp image capture, stabilizing your grip creates reliable impact conditions every time you step over the ball.